
Every product I work on ends up needing a file upload.
A CRM needs client documents. A marketplace needs product photos. A finance tool needs receipts and bank statements, ideally read by OCR before anyone has to type a single number. I've built all three, and every time, the upload looked like a half-day ticket on the board.
It never was.
The file input and the drag-and-drop zone take an hour. Then the real list shows up. A progress bar that doesn't lie. A retry when the connection drops. Sending files straight to S3 so your server isn't streaming gigabytes it doesn't need to touch. A 2 GB video that fails at 90% and has to start again from zero, unless you did multipart. Previews, validation, screen reader announcements. And then someone asks whether the files get scanned for viruses.
After doing that dance a few times, I didn't want to do it again. UploadCN is what I built instead.
What it is
UploadCN is a set of upload components and blocks for shadcn/ui, with a tested upload engine underneath. You install the UI the shadcn way, as source code that lives in your project:
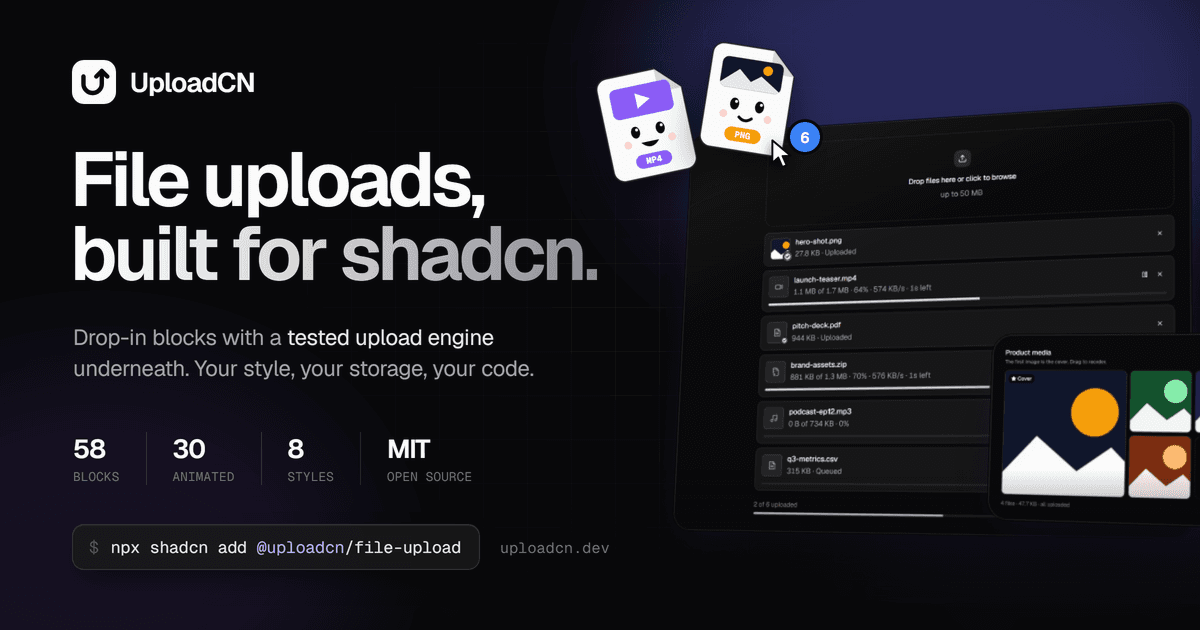
npx shadcn@latest add @uploadcn/file-uploadThat gives you a dropzone with a full upload queue, progress, speed, time remaining and batch actions. Using it is one line:
import { FileUpload } from "@/components/file-upload"

<FileUpload accept="image/*,application/pdf" maxSize={20_000_000} maxFiles={10} />
Behind that line, files are checked in the browser, queued three at a time, sent directly to your bucket, retried on network errors, and shown with progress you can actually trust.
There are 58 blocks right now, and 30 of them are animated. Most are practical: an avatar uploader with round cropping, a form field that works with react-hook-form and server actions, a CSV import that checks your columns before anything uploads, a document checklist for onboarding and KYC flows. A few are just for fun, like a folder that opens when you drag files over it, or a paper plane button that takes off once the upload finishes. I'll admit those took longer than they had any right to.
The decision that shaped everything
shadcn/ui made a simple idea popular: you don't install a component library, you copy the components into your repo and own them. I love that for UI, and my first plan was to do the same with everything, engine included.
I changed my mind when I looked at what that meant. The queue, the retries, chunking, resume, the S3 multipart protocol and the React bindings add up to roughly 6,500 lines of code. Nobody wants to own that. You want it to work, and when it breaks, you want the fix to reach you.
And the fixes are real. A few of the edge cases the engine deals with today:
- The ETag trap. A multipart upload to S3 needs the ETag of every part to finish. The browser can only read that header if your bucket's CORS rules expose it. Leave out
ExposeHeaders: ["ETag"]and the very last step fails, with an error that tells you close to nothing. - Knowing what to retry. Timeouts, 408, 425, 429 and any 5xx get retried with exponential backoff. A 403 is never going to succeed, so retrying it only wastes the user's time. And when the server sends a
Retry-Afterheader, the engine waits as long as it's told. - StrictMode. React runs effects twice in development, which is a great way to accidentally start every upload twice.
If the engine were copied source, every one of those fixes would stop at whatever version you copied. So I split it. Everything you see is source in your repo: components, blocks, anything you'd want to restyle or rewrite. The hard parts ship as three small npm packages:
@uploadcn/coreis the engine itself. Zero runtime dependencies, about 19 KB gzipped.@uploadcn/reacthas the hooks and headless primitives, about 11 KB.@uploadcn/serversigns upload routes and talks to S3, R2, local disk and Cloudinary. It never leaves your server.
shadcn/ui already does this for its own hardest components, by the way. Drawer is built on vaul, Calendar on react-day-picker. The behavior is a dependency. The look is yours.
How a file actually gets to S3
This is the part most tutorials skip, so here's the whole trip with the S3 adapter:
- The browser checks the file and asks your route for a signed URL.
- Your route checks who's asking, plus the file's size and type, and signs a PUT. The signature locks the content type and length, so S3 refuses anything else.
- The browser uploads straight to the bucket and tracks progress along the way.
- When it's done, the browser tells your route. The route confirms the object really exists, then runs your
onUploadComplete, which is where you save the record or start a scan.
The route is a single file:
import { UploadRouteError, createUploadRoute, s3Storage } from "@uploadcn/server"
import { auth } from "@/lib/auth"
import { db } from "@/lib/db"

export const { POST } = createUploadRoute({
  storage: s3Storage({
    bucket: process.env.S3_BUCKET!,
    region: process.env.S3_REGION!,
    accessKeyId: process.env.S3_ACCESS_KEY_ID!,
    secretAccessKey: process.env.S3_SECRET_ACCESS_KEY!,
  }),
  maxFileSize: 500 * 1024 * 1024,
  allowedTypes: ["image/*", "application/pdf"],
  async authorize({ key }) {
    const session = await auth()
    if (!session) throw new UploadRouteError("Unauthorized", 401)
    // Multipart steps carry the key, so make sure it belongs to this user.
    if (key && !key.startsWith(`${session.user.id}/`)) throw new UploadRouteError("Forbidden", 403)
    return session.user
  },
  getKey: ({ auth, file }) => `${auth.id}/${crypto.randomUUID()}/${file.name}`,
  async onUploadComplete({ auth, key, file }) {
    return db.file.create({ data: { userId: auth.id, key, name: file.name, size: file.size } })
  },
})
Files of 64 MB and up switch to multipart on their own. Parts are signed one at a time, uploaded in parallel and retried individually. So when the wifi drops at 90%, the upload pauses and carries on from the last finished part instead of starting over. It even survives a page reload.
Storage is pluggable. S3 and Cloudflare R2 are the usual picks, and anything S3-compatible works too: MinIO, Backblaze B2, DigitalOcean Spaces. There are also adapters for Cloudinary, local disk, tus servers and any plain HTTP endpoint, plus a browser-only mode for when you just want the files handed to your form.
Every style, every base, your icons
This is the part I underestimated the most.
shadcn has 8 styles now (Vega, Nova, Maia, Lyra, Mira, Luma, Sera and Rhea), 3 component bases (Radix, Base UI and React Aria) and 5 icon libraries. A component that only looks right in one of those combinations isn't really a shadcn component. It's a screenshot of one.
So the registry is compiled for every style and every base. When you run the install command, the CLI pulls the build that matches your project, and the icons are converted to the library you already use. If your app is on Lucide, you get Lucide. You don't end up shipping two icon sets in one bundle because of a file uploader.
Accessibility lives in the primitives
Every block is built from the same set of primitives, so they all inherit the same accessibility work:
- The dropzone is a real button. Enter or Space opens the file picker, so drag and drop is never the only way in.
- A polite live region announces when files are added, finished, failed (with the reason) or rejected.
- Progress bars expose their value and carry a label that names the file.
- Action buttons say exactly what they do: "Pause upload of video.mp4", not just "Pause".
- Animations are short, and they switch off for anyone who prefers reduced motion.
None of that shows up in a screenshot. It shows up the day someone using a screen reader tries to attach a file and it simply works.
Virus scanning and OCR
Two things kept coming up in real products, so they went into the server package.
Virus scanning runs right inside the upload route, with ClamAV, VirusTotal or any HTTP scanner you already pay for. OCR works with Google Vision, AWS Textract, Azure Document Intelligence and Mistral, or with Tesseract directly in the browser if you'd rather not send the file anywhere. If you've ever built a receipt or document flow, you know why both of these matter.
Testing it, and shipping it properly
UploadCN has more than 1,400 automated tests: Vitest for the engine, Playwright for real browser behavior. Upload code is full of situations you can't check by eye. A network drop halfway through part 7 of 12. A retry that has to respect Retry-After. Someone hitting pause while the server is still processing. Tests are the only reason I trust it.
Releases are automated end to end. Every change gets a Changeset, a release PR collects them, and merging that PR publishes to npm from GitHub Actions with npm provenance. Provenance means anyone can verify that the package on npm was built from this exact repository, in CI, and not on my laptop. For a package that touches your users' files, I think that's the bare minimum.
The docs site has 90 live examples, so you can try every block before you install anything. It also serves an llms.txt, so coding agents can read the docs properly instead of guessing.
Getting into the shadcn registry directory
In October 2026, UploadCN was accepted into the official shadcn registry directory. In practice, that means zero setup. You don't add a registry URL to your config or touch components.json. You run the command and the CLI already knows where to look:
npx shadcn@latest add @uploadcn/avatar-uploadFor a project I designed, built, documented and shipped on my own from Faisalabad, seeing it listed there was a very good day.
Try it before you build another uploader
If there's an upload flow on your board right now, give UploadCN ten minutes first:
- Play with the blocks at uploadcn.dev/examples
- Read the documentation
- Star the repo or open an issue on GitHub
It's MIT licensed, so use it anywhere. And if something breaks, or a block you need is missing, tell me. Most of what's in there exists because a real product needed it.